Connecting to the Cloud Platform’s Kubernetes cluster
To use the Ministry of Justice’s Cloud Platform, you need to connect to the Cloud Platform’s Kubernetes cluster.
This guide will take you through installing and configuring kubectl. kubectl is the official command line tool for Kubernetes.
Once installed and configured, you can use kubectl to deploy and manage your applications on the Cloud Platform, in addition to the Cloud Platform CLI.
Installing kubectl
You should install a version of
kubectlthat is within one minor version of the Cloud Platform’s Kubernetes cluster.
The Cloud Platform’s current Kubernetes cluster version is 1.33. You must use a kubectl version that is within one minor version difference of the cluster. Therefore, you should install kubectl version 1.31, 1.32 or 1.33.
There is official documentation on how to install kubectl, including how to install a specific version:
Authenticating with the Cloud Platform’s Kubernetes cluster
Once you’ve installed kubectl, you will need to authenticate with the Cloud Platform’s Kubernetes cluster.
You will need to:
- be part of the
ministryofjusticeGitHub organisation - be part of the correct GitHub team(s) for your service
Joining the GitHub organisation
If you have a @digital.justice.gov.uk or @justice.gov.uk email address and only require access to the ministryofjustice Organisation, you can simply join via SSO.
For more information, please refer to the Operations Engineering user guide.
For any issues, or if you are unable to join via SSO, please contact #ask-operations-engineering
Joining the correct GitHub teams
You can find the correct GitHub team(s) to join by:
- finding your service’s namespace in
cloud-platform-environments - in your namespace directory, view the
01-rbac.yamlfile - there will be at the least one
subjectofkind: Group, whosenameis the GitHub team you need to join, ie:
subjects:
  - kind: Group
    name: "github:my-awesome-team"
    apiGroup: rbac.authorization.k8s.io
- ask your team to add you to the listed GitHub team(s)
Generating a kubeconfig file
To access the Cloud Platform’s Kubernetes cluster through kubectl, you will need to generate a kubeconfig file.
The kubeconfig file stores an authentication token for Kubernetes clusters.
To generate a kubeconfig file for the Cloud Platform’s Kubernetes cluster:
- Browse to the login URL for the Cloud Platform
- Select “Continue with GitHub”
- Login to GitHub (if you’re not already logged in)
- Authorise the “MOJ Cloud Platforms Auth0 (prod)” application in GitHub
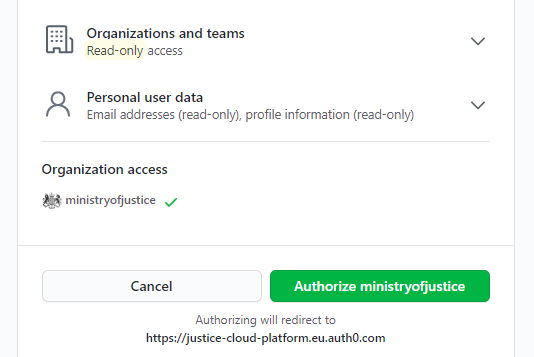
- Accept
live:kubernetesrequesting access to your justice-cloud-platform account - Select “Download config file”
Note: There can be a delay of a few seconds before the config file is populated with your credentials and ready to download. You can verify that it is ready by taking a look at the code block in the “Authenticate Manually” section on the Kuberos webpage. If the code block is populated with your credentials, and not listing
undefinedfor each field, then the config file is ready to download.
Move the config file to the location expected by kubectl:
~/.kube/config:$ mkdir ~/.kube $ mv ~/Downloads/kubecfg.yaml ~/.kube/configReduce the permissions on the file by running:
$ chmod 600 ~/.kube/configTell
kubectlto use this configuration by running:$ kubectl config use-context live.cloud-platform.service.justice.gov.ukVerify the configuration file by running:
$ kubectl get namespacesYour output should be similar to:
NAME                                              STATUS   AGE
abundant-namespace-dev                            Active   100d
...
Troubleshooting: “current” context
If you see an error like this when executing kubectl commands:
The connection to the server localhost:8080 was refused
A common reason for this is that the “current” context has not been set. Check it by running:
kubectl config get-contexts
If current context is set correctly, you’ll see a *, like this:
CURRENT   NAME                                         CLUSTER                                      AUTHINFO                 NAMESPACE
*         live.cloud-platform.service.justice.gov.uk   live.cloud-platform.service.justice.gov.uk   <your github e-mail>
If the * is missing, then you need to set the context with the use-context command mentioned above.
Using multiple kubeconfigs
You can have two kubeconfig files, corresponding to different clusters, which is useful when working on multiple clusters. This is a guide to being able to manage multiple kubeconfigs, so you can conveniently switch the cluster that kubectl connects to.
Essentially we will merge the kubeconfigs into a single file, and use kubectl config use-context to switch between them.
Assuming you already have a kubeconfig for a test cluster, download another kubeconfig for live from login.cloud-platform.service.justice.gov.uk.
Move the kubeconfig to your .kube folder:
mv ~/Downloads/kubecfg.yaml ~/.kube/config-liveEdit
~/.kube/config-live, and change the username in two places, from<firstname>.<lastname>@digital.justice.gov.ukto<firstname>.<lastname>@live, as shown below:contexts: - context: cluster: live.cloud-platform.service.justice.gov.uk user: <firstname>.<lastname>@live name: live.cloud-platform.service.justice.gov.uk current-context: "" kind: Config preferences: {} users: - name: <firstname>.<lastname>@liveExplanation: If we don’t rename the username, then the merge will overwrite one of the them and their token, which is different between the clusters.
Copy your existing test cluster credentials into a separate file:
cp ~/.kube/config ~/.kube/config-testEdit
~/.kube/config-test, and change the username in two places, from<firstname>.<lastname>@digital.justice.gov.ukto<firstname>.<lastname>@test, as shown below:contexts: - context: cluster: test.cloud-platform.service.justice.gov.uk user: <firstname>.<lastname>@test name: test.cloud-platform.service.justice.gov.uk current-context: "" kind: Config preferences: {} users: - name: <firstname>.<lastname>@testMerge the two config files together into a new config file and replace your old config with the new merged config:
KUBECONFIG=~/.kube/config-test:~/.kube/config-live kubectl config view --flatten > /tmp/config && mv /tmp/config ~/.kube/config
Now using the single config file, you can switch between test and live context
For test:
kubectl config use-context test.cloud-platform.service.justice.gov.uk
For live:
kubectl config use-context live.cloud-platform.service.justice.gov.uk
Where to go from here?
Now that you’ve setup kubectl, you might want to look at this handy cheatsheet.
Once you are ready to deploy applications you will need to create a namespace first.